


Table of Contents
- Why Managing Asbestos During Home Renovations Matters
- How to Identify Asbestos in Older Homes Before You Start
- Legal Asbestos Removal Requirements in Australia
- Asbestos Safety Precautions for DIY: A Step-by-Step Plan
- What to Do If You Accidentally Disturb Asbestos
- Budgeting and Timeline for Professional Asbestos Removal
- Conclusion: Your Renovation Safety Roadmap
- Frequently Asked Questions
Last Updated: September 9, 2026
Why Managing Asbestos During Home Renovations Matters
Managing asbestos during home renovations is the single most important safety decision on any older property. Asbestos was widely used in Australian building materials through the 1980s, so homes built before then almost certainly contain some form of it.
The danger begins when cutting, drilling, sanding or demolition release asbestos fibres into the air. Once inhaled, those fibres can cause serious diseases that may not appear for 20 to 40 years. Identifying asbestos-containing materials before work begins is the foundation of a safe renovation.
How to Identify Asbestos in Older Homes Before You Start
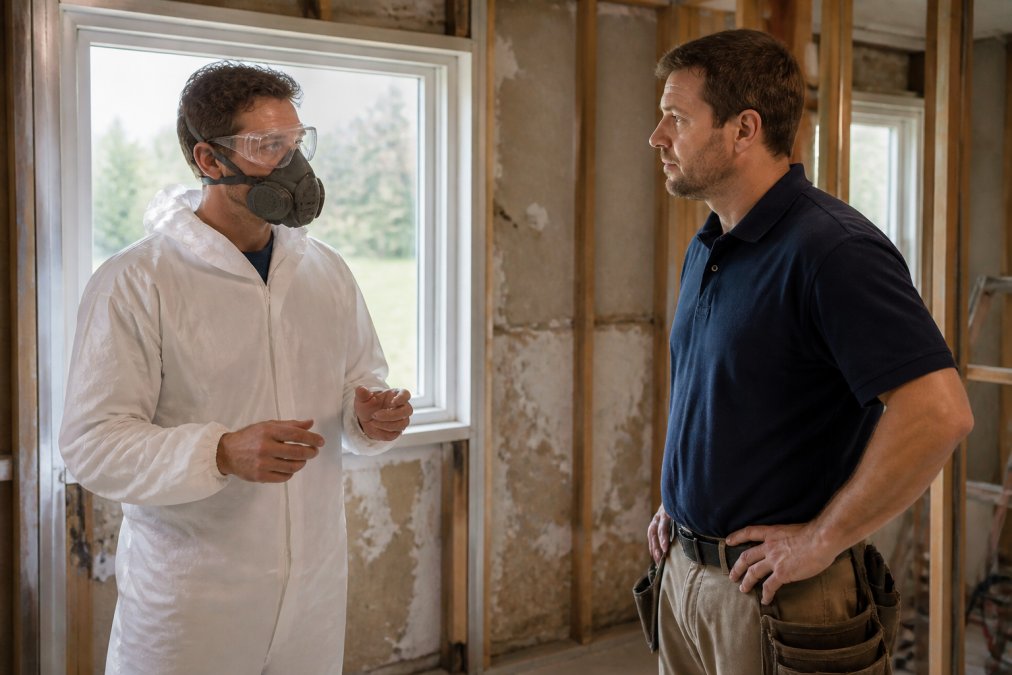
Identifying asbestos in older homes requires knowing where it was commonly used, though visual inspection alone is never enough. The most common location is asbestos cement sheeting, often called fibro, used for external cladding, eaves, internal walls and roofing on homes built before 1990.
Other common locations include vinyl floor tiles and their backing, corrugated roof sheeting, insulation around hot water pipes, and backing boards behind wall tiles. A 1920s weatherboard home might have asbestos in the roof lining, while a 1970s brick veneer home is more likely to have fibro cladding and floor tiles.
The only reliable way to confirm asbestos is laboratory testing. A licensed assessor can take samples safely, or you can use a testing laboratory that supplies a sampling kit. Never break off a piece yourself to “check.” If your home predates 1990, treat suspect material as asbestos until testing proves otherwise.
Never attempt to identify asbestos by smell, texture or visual inspection alone. Asbestos fibres are microscopic, and bonded asbestos can look identical to ordinary cement sheeting. Assume it is asbestos until a laboratory test confirms otherwise.
Legal Asbestos Removal Requirements in Australia
Asbestos removal requirements in Australia depend on whether the material is bonded or friable. Bonded asbestos, where fibres are firmly bound in cement, can legally be removed by a homeowner in most states if done safely and disposed of correctly. Friable asbestos, which can be crumbled by hand pressure, must always be removed by a licensed professional.
Every state and territory has its own work health and safety regulator. Key requirements that apply everywhere include wetting down the material to suppress dust, not using power tools that create fine particles, and double-wrapping waste in heavy-duty plastic sheeting labelled as asbestos.
Waste disposal is another legal obligation. Asbestos waste can only be taken to licensed disposal facilities, and most councils require you to book ahead and follow their packaging rules. Fines for illegal disposal are substantial, and some councils now inspect skip bins at transfer stations. Check your local council regulations on asbestos waste before you move any material.
The legal line is simple: bonded asbestos can be DIY-removed with strict precautions, but friable asbestos, and any job over 10 square metres in some states, requires a licensed removalist. Check your state regulator before starting.
Asbestos Safety Precautions for DIY: A Step-by-Step Plan
A safe DIY approach to asbestos removal centres on one principle: keep the material wet and keep fibres contained. The following asbestos safety precautions for DIY work protect you, your family and your neighbours.
Step 1: Confirm the material and the law. Have the material tested by a NATA-accredited laboratory and verify your planned removal meets the legal threshold for DIY work in your state.
Step 2: Prepare the site. Clear the area of furniture, seal off doorways and vents with 200-micron (0.2 mm) plastic sheeting, and warn neighbours if work is near a shared boundary. Turn off heating or cooling systems that could circulate air.
Step 3: Select your PPE with precision. This is the most critical step; a generic ‘dust mask’ is not acceptable. Your respiratory protection must be a P2 respirator meeting AS/NZS 1716:2012. Look for compliance markings on the respirator or packaging.
- Respirator types: A half-face respirator with replaceable P2 filters is the most common and cost-effective choice for DIY work. Disposable P2 respirators are also acceptable for short jobs, but they must be discarded as asbestos waste after a single use. A P1 respirator is not sufficient.
- Fit is everything: A respirator only works if it seals to your face. Perform a fit check each time you put it on: cover the filter inlets with your hands and breathe in gently. The mask should collapse slightly against your face. Facial hair will break this seal and compromise your protection.
- Coveralls: Wear disposable Type 5/6 coveralls (CE Category III) with an attached hood. Do not use cloth overalls or a standard work coat, as fibres will cling to them. Ensure the hood is worn over your respirator straps.
- Gloves and boots: Use heavy-duty disposable nitrile gloves, not latex. Tape the glove cuffs to the coverall sleeves. Wear rubber boots that can be wiped down, rather than laced-up shoes. Tuck the coverall legs over the outside of your boots.
Step 4: Wet the material down. Use a fine water spray to dampen the asbestos cement sheeting thoroughly before handling. The goal is to suppress dust, not to soak the material. Add a few drops of dishwashing detergent to the water to help it penetrate. Keep a spray bottle nearby and re-wet as you work. Never use a high-pressure hose, which creates a mist that can carry fibres.
Step 5: Remove sheets whole where possible. Remove nails or screws rather than breaking the sheet. If a sheet cracks, wet the broken edges immediately. Lower sheets to the ground rather than dropping them. Never use power tools on asbestos cement; the fine dust they create is extremely hazardous. If you must cut a sheet, score it with a hand saw or knife and snap it along the line, keeping the surface wet.
Step 6: Double-wrap all waste. Place each piece in a plastic bag, seal it, then place that bag inside a second labelled asbestos bag. Use 200-micron (0.2 mm) plastic sheeting or purpose-made asbestos waste bags. Seal the outer bag with duct tape and label it clearly. Do not overfill bags, as this increases the risk of tearing.
Step 7: Decontaminate. Remove coveralls carefully inside out and bag them as asbestos waste. Wipe down your respirator with a damp cloth and remove the filters, bagging them as waste. Wash your hands and face thoroughly. Shower and wash your hair before leaving the site. Do not eat, drink, or smoke in the work area.
Before you start, do a ‘dry run’ of your PPE donning and doffing procedure. Practise removing your coveralls and respirator in the correct order (coveralls first, then respirator) to avoid contaminating yourself. This is a skill that is easy to get wrong under pressure.
| Step | Action | Key Detail |
|---|---|---|
| 1 | Confirm material and law | NATA-accredited lab test; check DIY threshold |
| 2 | Prepare the site | Seal vents with 200-micron plastic, warn neighbours |
| 3 | Select PPE | P2 respirator (AS/NZS 1716:2012), Type 5/6 coveralls |
| 4 | Wet the material | Fine spray with detergent; re-wet constantly |
| 5 | Remove sheets whole | Avoid breaking; never use power tools |
| 6 | Double-wrap waste | Two sealed 200-micron bags, labelled |
| 7 | Decontaminate | Bag coveralls, shower after work |
This level of PPE detail is often the difference between a safe job and a dangerous one. A P2 respirator that does not fit, or coveralls not disposed of correctly, can negate all your other precautions.
What to Do If You Accidentally Disturb Asbestos
If you accidentally disturb asbestos, stop work immediately and do not clean up with a vacuum cleaner or broom. Stop anyone else entering the area and close doors and windows to contain dust.
Wet the disturbed area gently with a fine water spray to settle fibres, then cover it with plastic sheeting until proper removal can be arranged. If you were wearing PPE, keep it on until you have exited and decontaminated. If not, leave promptly and avoid tracking dust through the home.
For a small disturbance, you may manage cleanup yourself using the wet wiping method and double-bagging waste. For a larger disturbance, or if dust has spread, engage a licensed removalist to assess and decontaminate the area.
Do not use a household vacuum cleaner to clean up asbestos dust. Standard vacuums blow fine fibres straight through their filters and back into the air. Only specialised HEPA vacuums approved for asbestos use are safe for this task.
Budgeting and Timeline for Professional Asbestos Removal
Budgeting for professional removal depends on the amount of material, its location and whether it is bonded or friable. A licensed removalist provides a quote after assessing the site, typically covering removal, transport and disposal.
What drives the cost? Several factors influence the final quote you receive:
- Type of asbestos: Friable asbestos removal is significantly more expensive than bonded because it requires a higher licence class, negative air pressure enclosures and more stringent decontamination procedures.
- Accessibility: Asbestos in a roof cavity or under a house is harder to access and therefore more labour-intensive than a simple external wall cladding job.
- Quantity: While some states have a 10-square-metre threshold for DIY work, even small jobs have a minimum call-out fee. A small job of a few sheets might cost more per square metre than a larger job.
- Disposal fees: Licensed landfills charge per tonne for asbestos waste, and these fees are passed on to you.
- Air monitoring and clearance: If you require a formal clearance certificate, this is an additional cost, usually charged separately by an independent licensed asbestos assessor (IAA).
The timeline for professional removal is usually shorter than homeowners expect. A straightforward removal from a single room can often be completed in one to two days. The critical final phase is post-removal clearance testing, often overlooked in DIY guides but essential for long-term safety.
What is clearance testing? After a licensed removalist finishes, the area must be deemed safe for reoccupation. This is performed by an independent licensed asbestos assessor (IAA) with no financial interest in the removal job. The assessor will:
- Visually inspect the work area to ensure all visible asbestos debris and dust have been removed.
- Conduct air monitoring using specialised equipment that draws a known volume of air through a filter. The filter is then analysed by a NATA-accredited laboratory to determine the fibre concentration.
- Issue a clearance certificate if the air sample results are below the safe exposure standard (0.01 fibres per millilitre of air, measured over a minimum of two hours). This certificate is your formal, documented proof that the area is safe to occupy and renovate.
Why is this critical for DIY jobs? If you remove bonded asbestos yourself, clearance testing is not legally required in most states. However, without a certificate you have no independent verification that your work was effective. For a relatively small fee, it is a worthwhile investment in your family’s health.
Factor professional removal and clearance testing into your renovation budget before you start. If your renovation involves a licensed builder, they will typically coordinate removal and provide clearance documentation. The PBS Carpentry & Maintenance Services & Home Extensions Melbourne team can advise on whether your project needs a licensed removalist.
A professional removal job is not finished until you have a clearance certificate in hand. This document, issued by an independent assessor, is your proof that the air is safe and the area is ready for the next stage of your renovation. Never accept a verbal assurance from a removalist as a substitute for this formal certification.
For post-renovation peace of mind, request a clearance certificate from your removalist before new walls or floors are installed. This documentation confirms the area meets safe levels and provides a record for future renovations. Guidance on clearance testing is available from Safe Work Australia’s asbestos guidance, which sets the national framework that state regulators enforce.
Conclusion: Your Renovation Safety Roadmap
Managing asbestos during home renovations comes down to three actions: identify before you disturb, follow legal removal requirements, and never cut corners on safety precautions. Start by testing suspect material, then decide whether the job is within DIY limits or needs a licensed professional.
For most homeowners renovating a pre-1990 home, the safest path is to build asbestos management into the project from the start. That means budgeting for testing, professional removal where required, and a clearance certificate before new work begins. Our team provides a personalised approach from initial assessment through to completion, ensuring your renovation is safe, compliant and finished on time. WorkSafe’s asbestos safety information is a useful reference for understanding your obligations.
Get a quote from PBS Carpentry & Maintenance Services & Home Extensions Melbourne and start your renovation with the confidence that comes from working with professionals who understand older homes.
Frequently Asked Questions
What are the risks of asbestos during home renovations?
Disturbing asbestos-containing materials releases fine fibres into the air. Inhaling these fibres can cause serious diseases like asbestosis, lung cancer, and mesothelioma. The latent health effects often appear decades after exposure. The risk increases with the amount and duration of exposure. This is why managing asbestos during home renovations requires a strict plan for identification, containment, and safe removal before any demolition or structural work begins.
Is it legal to remove asbestos myself during a renovation?
In Australia, it is legal to remove bonded asbestos yourself in most states, provided you follow strict safety guidelines. However, you must not remove friable asbestos, which is highly dangerous and requires a licensed removalist. Check your local council regulations and state work health and safety laws first. Many homeowners find that hiring a licensed professional is safer and often more cost-effective when factoring in the required equipment and waste disposal costs.
What should I do if I accidentally disturb asbestos while renovating?
Stop work immediately. Keep everyone, including pets, away from the area. Do not vacuum or sweep up debris, as this spreads fibres. Close off the room and turn off any air conditioning or heating. Wet the material gently with a fine mist of water to suppress dust. Contact a licensed asbestos removalist right away to assess the situation and arrange for professional decontamination and safe disposal.
How can I identify asbestos-containing materials in my home?
Homes built or renovated before 1990 are likely to contain asbestos-containing materials. Common locations include corrugated cement roof sheeting, flat wall cladding, vinyl floor tiles, and insulation behind walls. The only way to confirm is through laboratory testing of a sample. Contact your state’s work health and safety authority for guidance on approved testing labs.

