


Table of Contents
- Step 1: Understand Your Heritage Overlay and Permit Requirements
- Step 2: Get a Structural Assessment and Manage Asbestos Before You Start
- Step 3: Restore Weatherboard Cladding and External Trim
- Step 4: Plan Your Californian Bungalow Renovation Costs and Budget
- Step 5: Insulate 1920s Timber Homes for Thermal Efficiency
- Step 6: Timber Flooring Installation for Period Homes
- Step 7: Reconfigure the Floor Plan While Preserving Period Character
- Common Mistakes to Avoid When Renovating 1920s Weatherboard Homes
- Frequently Asked Questions
Last Updated: September 18, 2026
Step 1: Understand Your Heritage Overlay and Permit Requirements
Before you touch a single weatherboard, check whether your property sits under a heritage overlay. This step stops renovating 1920s weatherboard homes from becoming a costly legal fight.
A heritage overlay is a planning control protecting buildings with recognised historical or architectural value. It limits external changes, and sometimes internal ones where significant original fabric is involved.
In Victoria, councils manage these controls under the Planning and Environment Act 1987. Each council then writes its own local planning scheme, which includes the heritage overlay schedule that applies to your address. Your local council decides what needs a permit.
A heritage overlay does not freeze your house in time. It shapes what you can do, and renovating a 1920s weatherboard home under an overlay is entirely possible, you just work with the controls.
The two permit types you need to understand
A planning permit is triggered by the heritage overlay and covers external alterations, demolitions, extensions, new fences, and sometimes painting if the schedule controls colour. A building permit is separate, structural safety, siting and construction standards under the Building Act 1993 and Building Regulations 2018. Many projects need both, assessed by different people on different timelines.
A common trap is assuming internal changes need no planning permit. Often true, but not always: if the work affects a heritage-listed interior element, an original fireplace, pressed-metal ceiling or staircase, the schedule may still capture it.
How to read your own overlay schedule
Start with these checks:
- Pull your property’s planning report from your council (often free or low-cost online)
- Identify the exact overlay code, for example HO123, and read the schedule attached to it
- Check whether your property is individually listed or covered by a precinct-wide overlay
- Confirm whether the schedule includes a Statement of Significance and a Conservation Management Plan
- Book a pre-application meeting with a council planner
- Ask what changes need a planning permit versus a building permit
Precinct overlays are usually less strict than individual listings. If your home is one of many similar 1920s weatherboard houses on the street, the council is often more concerned with the streetscape than every detail of your rear extension.
VicSmart and other faster pathways
Some straightforward applications, certain single dwellings, minor works, some fences, can go through VicSmart, a fast-track assessment under the planning scheme. Not every heritage application qualifies, but where it does it can cut months off the timeline. Ask your council planner whether your project is VicSmart-eligible.
What councils actually assess
When a planner reviews a heritage application, they typically look at:
- Whether the change is visible from the street
- Whether it is reversible without damaging original fabric
- Whether new work is distinguishable from original work on close inspection
- Whether the scale, form, and materials respect the period
- Whether the proposal harms the Statement of Significance
The principle of reversibility matters more than most homeowners realise: a rear extension removable later without destroying the original house is usually viewed more favourably than one cutting into the heritage fabric.
Book your council pre-application meeting before you brief any designer. It costs little and saves months. Planners will tell you what they will and won’t accept on your street, and they will often flag issues that a designer would otherwise discover only after drawings are done.
What happens if you skip this step
Unapproved works under a heritage overlay can attract enforcement notices, fines, and in serious cases orders to demolish or reverse the work at your own cost. Councils can also refuse retrospective permits. Getting this wrong costs far more than a pre-application meeting and a permit.
Step 2: Get a Structural Assessment and Manage Asbestos Before You Start
A structural assessment comes first, always. A qualified engineer checks the stumps, bearers, joists and roof frame before any design work begins.
Expect the engineer to report on:
-
Foundation and stump condition, including stump type and spacing
-
Subfloor ventilation and damp
-
Wall framing and timber rot
-
Roof structure and tie-downs
-
Any previous alterations that may have compromised the frame
-
Fibro cement sheeting used in bathrooms, laundries, and sometimes kitchens
-
Eaves and soffit linings, often flat fibro sheets under the roofline
-
Fencing, some 1920s homes had fibro fences added later
-
Vinyl floor tiles and the adhesive underneath
-
Roof sheeting on some later extensions
-
Backing to electrical switchboards and some heater flues
Friable versus non-friable, why it matters
The safe process
- Do not cut, sand, drill, or break suspect material. Disturbing it is what releases fibres.
- Engage a licensed asbestos assessor to identify and sample suspect materials. This is a separate role from a removalist in Victoria.
- Get a written asbestos register or clearance report before any demolition or trade work begins.
- Engage a licensed removalist for removal, with a written scope of works and air monitoring where required.
- Dispose of asbestos at a licensed facility, it cannot go in general waste or a skip bin.
- Obtain a clearance certificate before anyone re-enters the work area.
What it costs and why it is worth it
Never let a trade start demolition on a pre-1980s home without an asbestos clearance. Cutting into a single fibro sheet can contaminate an entire room and expose your family, your trades, and your neighbours. The cost of proper removal is trivial compared to the cost of a contamination event.
How asbestos interacts with the rest of your renovation
Step 3: Restore Weatherboard Cladding and External Trim
Weatherboard cladding is the face of your home, and it takes the worst of the weather. Restoring it well keeps water out and protects the frame underneath.
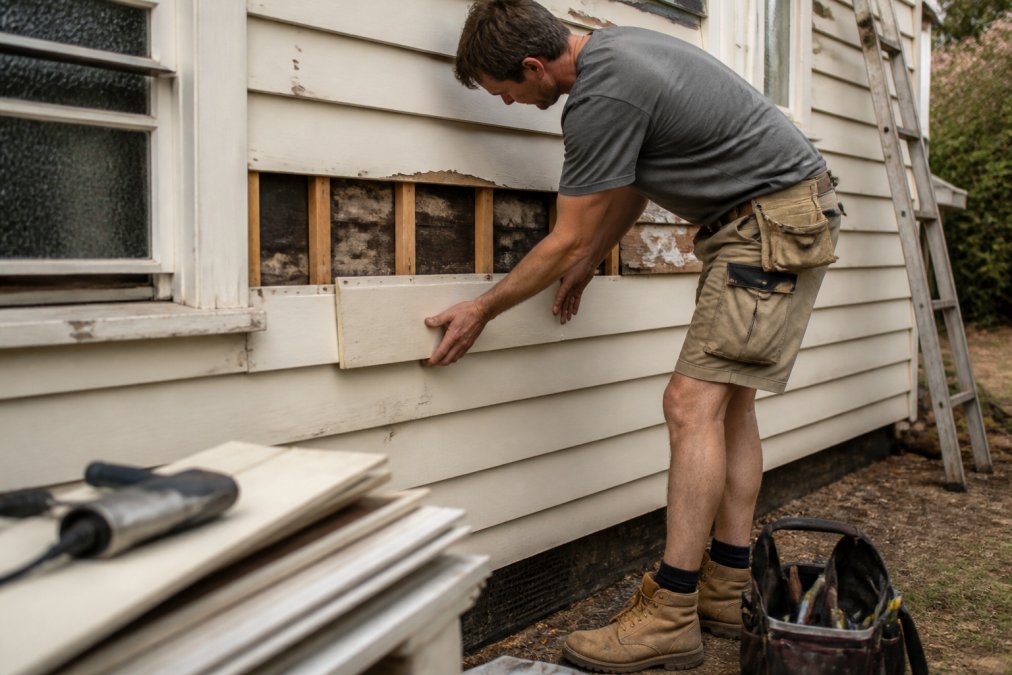
Common repairs include:
- Replacing rotted boards with matching profiles
- Re-nailing loose boards
- Re-caulking joints and gaps
- Sanding and repainting the full facade
Step 4: Plan Your Californian Bungalow Renovation Costs and Budget
Californian Bungalow renovation costs vary widely, so a realistic budget matters more than a headline number. Pricing depends on scope, materials, site access and hidden damage.
Here’s a simple budget structure to follow:
| Budget Item | What It Covers | Contingency |
|---|---|---|
| Structural works | Stumps, framing, subfloor | 20% |
| Cladding and trim | Weatherboards, fascia, painting | 15% |
| Insulation and glazing | Ceiling, floor, double glazing | 10% |
| Flooring | Timber supply and install | 10% |
| Permits and reports | Council, engineering, asbestos | 5% |
The biggest budget killer is hidden structural damage found after work starts. Always hold a contingency buffer and agree in writing on how variations get priced and approved.
Step 5: Insulate 1920s Timber Homes for Thermal Efficiency
Insulating 1920s timber homes is the single best upgrade for comfort and running costs. They were built before insulation was standard, so heat escapes through ceiling, floor and walls.
Focus on these areas first:
- Ceiling insulation above the living zones
- Underfloor insulation between the joists
- Draught sealing around windows and doors
- Double glazing for the coldest rooms
Step 6: Timber Flooring Installation for Period Homes
Timber flooring installation for period homes should match the original character, not fight it. Most 1920s homes had timber floors, and restoring them beats covering them.
Your options:
- Restore original boards: sand and polish existing timber
- Match new boards: source species and width to suit the era
- Lay new flooring over the subfloor: faster but changes floor height
Step 7: Reconfigure the Floor Plan While Preserving Period Character
Reconfiguring the floor plan is where renovating 1920s weatherboard homes gets exciting, and where character is most at risk. You can open up dark rooms without losing the period feel.
Keep these period details intact:
- Ceiling roses and cornices
- Picture rails and skirting profiles
- Original doors and hardware
- Fireplace surrounds and mantels
Common Mistakes to Avoid When Renovating 1920s Weatherboard Homes
The biggest mistake is starting work before you understand the permits, structure and asbestos. Every other error flows from skipping that groundwork.
Watch for these traps:
- Ignoring the heritage overlay: unapproved changes can be ordered to be reversed
- Skipping the structural assessment: hidden rot and stump failure blow out budgets
- Cutting suspect materials: unsafe and illegal without a licensed removalist
- Using modern trim that clashes: it cheapens the whole facade
- Under-budgeting for surprises: always hold a contingency
- Trying to manage every trade yourself: coordination is where timelines fail
Get the permits, the engineer’s report and the asbestos check done first. Everything after that is easier, cheaper and safer.
Frequently Asked Questions
Do I need a planning permit to renovate a 1920s weatherboard home?
If your property sits within a heritage overlay, you will likely need a planning permit for external changes such as extensions, facade restoration, or window replacements. Even without a heritage overlay, a building permit is required for most structural work. Check with your local council early, because the approval process can take several months depending on the scope and complexity of your project.
What are the common structural issues in 1920s timber homes?
Timber rot in weatherboards, stumps, and external trim is the most frequent problem, often caused by poor subfloor ventilation and damp proofing failures. Foundation movement and deteriorated stumps also appear in homes of this era. A structural assessment before renovation identifies these issues early, so you can budget for foundation repair and carpentry detailing alongside your planned upgrades rather than discovering them mid-build.
How much does it cost to renovate a Californian Bungalow in Melbourne?
Californian Bungalow renovation costs vary widely depending on scope, whether you are extending, and the condition of the existing structure. Cost-per-square-metre benchmarks are the most reliable way to compare quotes. Get a detailed quote from your builder that clearly separates structural work, finishes, and contingency, so you can see exactly what is included and what may cost extra.
Can I modernise a weatherboard house without losing its 1920s character?
Yes. The key is preserving original timber profiles, period detail preservation, and the facade’s architectural integrity while upgrading behind the scenes. Insulation retrofitting, double glazing, and open plan extension work can all be done sympathetically. Matching new carpentry detailing to original profiles and keeping external trim consistent are the two decisions that make the biggest difference to how the finished renovation looks.

